Choose the appropriate client or your own organization.
Click Configuration
(tab), then Credit Types (menu).
You see a list of existing credit types: to open the configuration
options for a type, click its name.
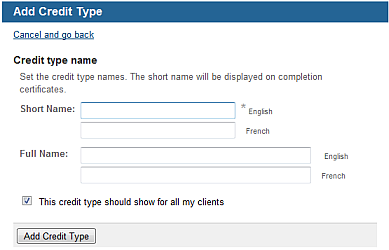
Click Add
a credit type.
You see a new
screen.
Enter a Short and Full Name for the credit type. Note that the short name appears on completion certificates.
Specify whether the credit type should apply to all clients or just the selected one.
Click
Add Credit Type.
Your see the list of membership types, including the one you just added.
